Call us
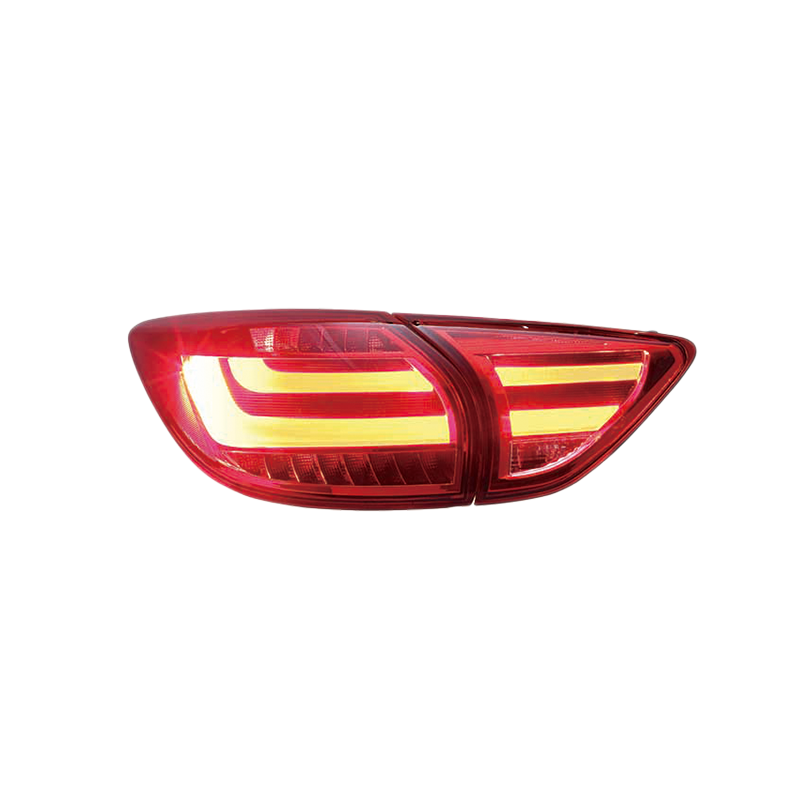
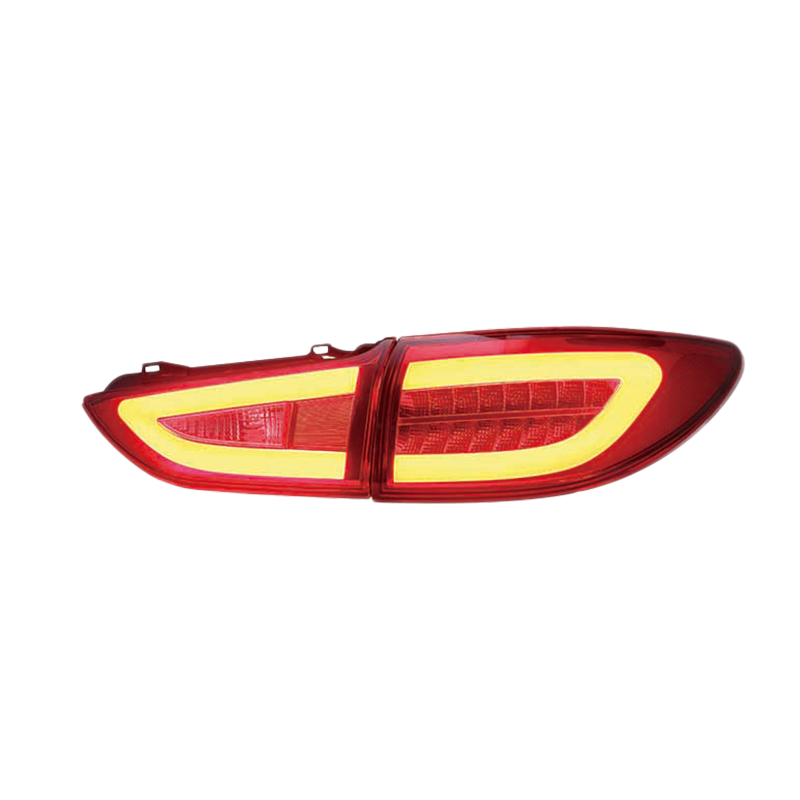
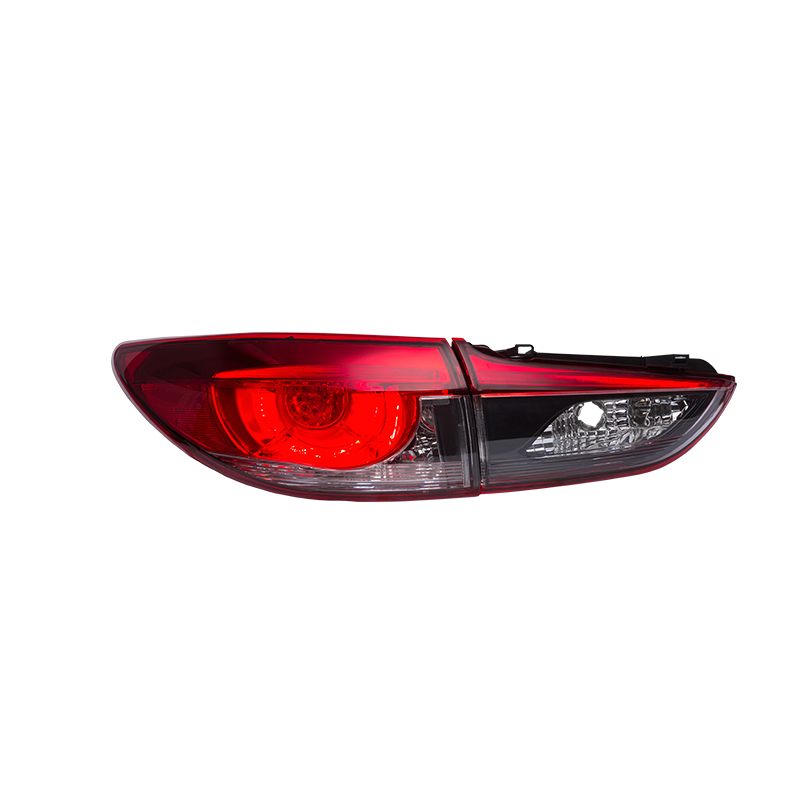
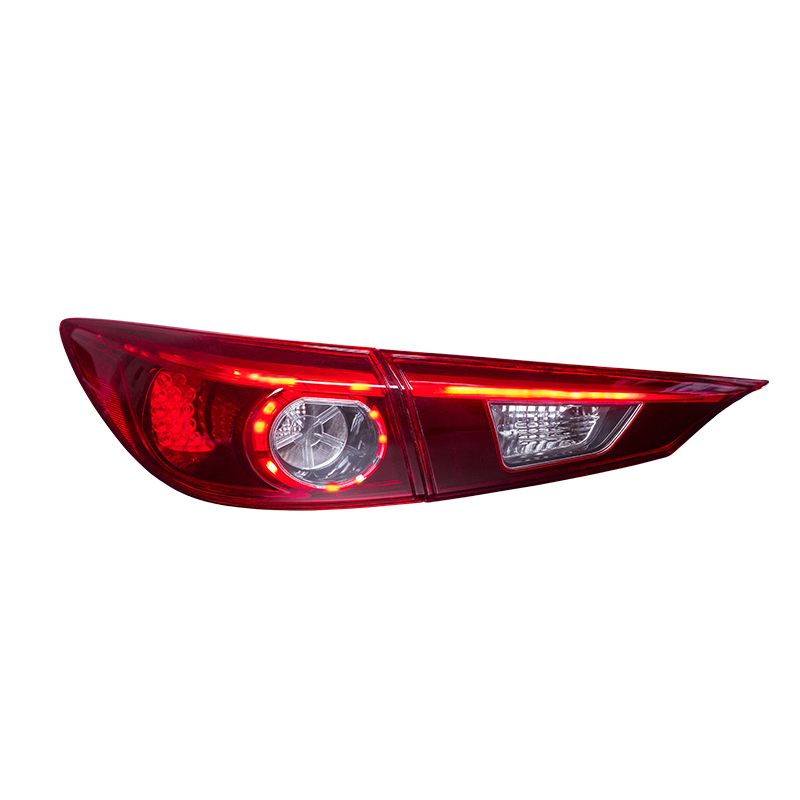
When manufacturing Mazda series tail lamp products, Baozhiwei applies the lean production concept throughout every production link to ensure the product's outstanding performance in appearance and quality.
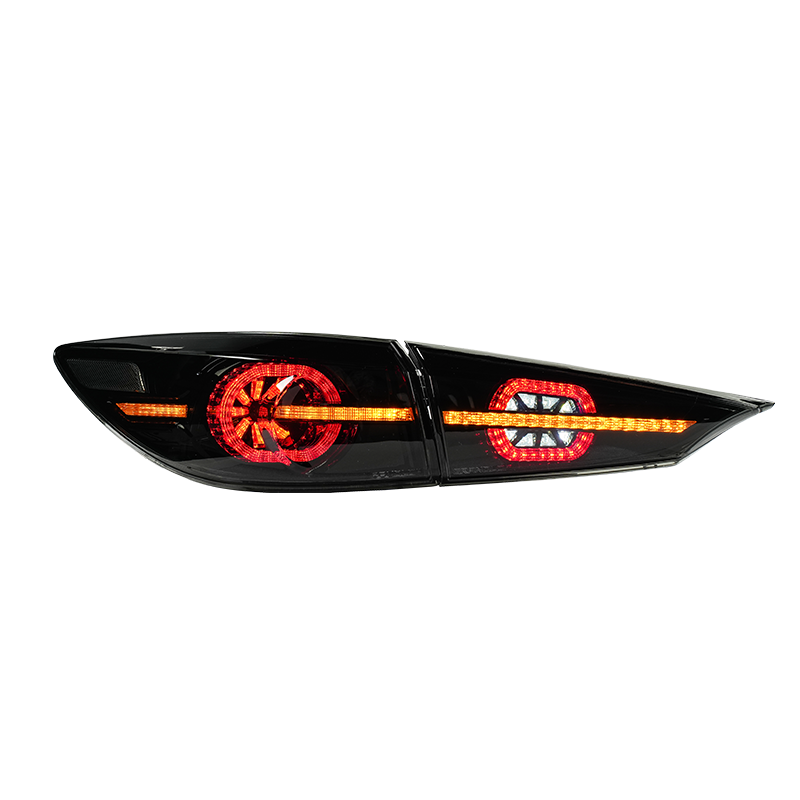
Our product designers have a deep understanding of Mazda's design concept to ensure that our tail lamp is greatly matched with the streamlined body and dynamic design of Mazda models in terms of style. This design harmony not only enhances the overall beauty of the vehicle but also enhances brand recognition.
Through lean production, we improve the production process, reduce unnecessary steps and waste, and improve production efficiency. This efficient production method enables us to respond quickly to market demand while maintaining high product quality.
We implement strict quality control on every link of tail lamp production, from the procurement of raw materials to the assembly of the final product, each step is subject to detailed inspection and testing. This meticulous quality control process ensures that every product meets the quality requirements of us and our customers.
We use advanced manufacturing technologies in the industry, including precision mold design and automated production lines. The application of these technologies not only improves production efficiency but also ensures the accuracy and consistency of product dimensions.
Our tail lamp products use high-quality optical materials and advanced optical design to ensure the brightness, uniformity, and illumination range of the light, and improve the safety of night driving.
Our products are designed with durability and reliability for long use in mind. Through rigorous environmental testing and durability testing, we ensure that the tail lamp can work stably in various adverse weather and road conditions.
We understand the personalized needs of each car owner and provide customized services, including different colors, patterns, and functional options, to meet the personalized needs of different customers.
Baozhiwei's Mazda series tail lamp products not only meet functional needs but also enhance the aesthetic value and driving experience of the vehicle.


Installing LED tail lights on a vehicle and then watching the turn signals blink at double or triple the normal rate is one of the more common frustrations in a...
READ MOREThe product listing looks right — the photos match the application, the price sits in a reasonable range, and the seller has a respectable review count. Three w...
READ MORERear-end collisions are among the most common types of road accidents, and a significant portion of them happen because the following driver simply did not have...
READ MOREYou buy a set of LED lights expecting them to outlast the car, but six months later they are flickering, dimming, or dead. The failure rarely has anything to do...
READ MOREYellowed tail light lenses are one of those problems that creep up slowly - the change happens over months, and by the time it is obvious, the lenses are well p...
READ MOREReplacing the tail lamp on a Mazda vehicle is a straightforward task that can be completed with basic tools and some careful attention. Whether the tail lamp is damaged, burnt out, or simply in need of an upgrade, performing this replacement yourself can save both time and money. Below is a step-by-step guide to help you replace the tail lamp on a Mazda car.
Step 1: Gather Necessary Tools and Parts
Before starting, ensure that you have all the necessary tools and a replacement tail lamp for Mazda model. You'll typically need a screwdriver (either flathead or Phillips, depending on the screws), a socket wrench, a ratchet set, and the replacement tail lamp that matches your vehicle's specifications. Always check your owner’s manual for the correct part number and make sure to purchase a quality replacement from a reputable supplier.
Step 2: Open the Trunk and Locate the Tail Lamp Assembly
The tail lamp assembly is usually accessed from inside the vehicle’s trunk. Open the trunk and remove any carpeting or panels that may cover the tail lamp housing. For many Mazda models, this will require removing the screws or bolts that secure the trim panel to the vehicle. In some cases, the tail lamp assembly may be accessible from the outside, but you can typically reach the fasteners more easily from inside the trunk.
Step 3: Disconnect the Wiring Harness
Once the tail lamp assembly is exposed, you will need to disconnect the wiring harness that powers the light. This can be done by pressing the release tab on the connector and gently pulling it apart. Be cautious not to damage the wiring, as it is essential for the new tail lamp to function properly.
Step 4: Remove the Old Tail Lamp Assembly
Now, remove the screws or bolts securing the old tail lamp assembly to the vehicle’s body. Use the appropriate screwdriver or socket wrench to loosen and remove these fasteners. Once the screws are removed, carefully pull the tail lamp assembly away from the vehicle. It may require some gentle wiggling if the assembly is tightly fitted.
Step 5: Install the New Tail Lamp Assembly
Take the new tail lamp assembly and align it with the mounting points on the vehicle. Gently push it into place, ensuring that the connectors for the wiring harness match the appropriate terminals on the new tail lamp. Reattach the wiring harness securely.
Car smoked rear tail lights, characterized by their darkened or tinted lenses, offer an aesthetically pleasing look to many vehicles, particularly when paired with modern, sleek designs. They are popular in aftermarket car modifications and are often used to create a more stylish, aggressive appearance. However, while they are visually appealing, there are some important considerations to keep in mind when using smoked tail lights on your car.
One of the primary considerations when installing smoked rear tail lights is their effect on visibility. The tinted lenses can reduce the brightness of the tail lights, which may make your vehicle less visible to other drivers, especially in low-light or nighttime conditions. This can pose a safety risk, as tail lights are crucial for alerting other drivers of your presence, particularly when braking or turning. It's essential to ensure that the smoked tail lights are of high quality and that the light output remains adequate for safety. Some high-quality smoked tail lights are designed with a clear lens or reflective coating to help enhance visibility.
In many regions, vehicle lighting is subject to regulations regarding brightness, color, and reflectivity to ensure road safety. Smoked tail lights, while popular for their appearance, may not meet local legal standards for brightness, especially if they are overly dark. Before installing smoked tail lights, it's important to check local laws regarding vehicle lighting to avoid potential fines or safety violations. In some areas, modifications that reduce the effectiveness of tail lights can be considered illegal, and you may need to install a less darkened version of smoked lights to remain compliant.
We are a modern headlight manufacturer that integrates R&D, design, production and sales. We mainly produce headlamps, taillights, daytime running lights and other automotive lighting products.
Add: No.3 Shiyang Road, Ningxi Town, Huangyan District, Taizhou City, Zhejiang Province, China
Whatsapp: +86-13105675552
Tel/Fax: +86-576-89161556
E-mail: [email protected]
Copyright © Taizhou Baozhiwei Vehicle Industry Co.,Ltd. All Rights Reserved.
Cheap Smoked Rear Tail Lights
 English
 русский
 Español